So I just recently tried using QEMU. Well, it was hard to setup before, thought I, 'cuz it has no certain GUI for easier ways to config a ready-to-use VM. Therefore I decided to write a small simple guide here for everyone, not only me, who want to setup QEMU for ready-to-use.
Of note is that, this guide is only for basic setup and use of QEMU; for serious other uses of QEMU, I recommend you to read the complete instruction document for using QEMU here. Also, this guide stays focused to the x86-64 QEMU system emulation; therefore, for some other systems you may have to re-adjust your syntax a little bit for it to really work. Other uses of QEMU can be referred from various sources on the Internet.
Firstly, you can download QEMU from the main website by choosing the version for your OS like Windows. On different Linux distros, you can use package managers to install it, and the package name might just be generally 'qemu'. For example on Debian or Arch (two (base) distros which I use mostly), the command is sequencely `$ sudo apt-get install qemu` and `$ sudo pacman -S qemu` (The dollar sign is a representation to the command prompt input indication on dumb terminal; don't type it in your commands!).
Remember to install other dependencies as well as updating your repositories for latest updates.
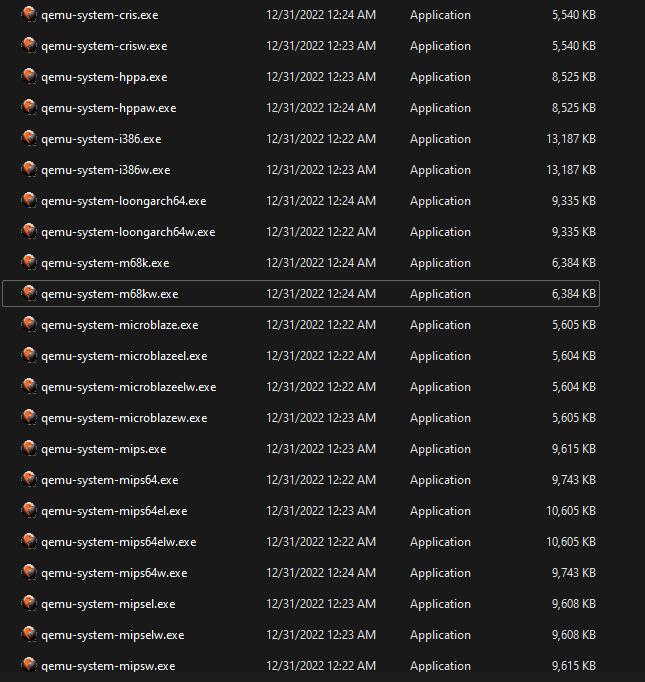
After installing QEMU, if you use Linux, then it's right away for you to run a session by typing `qemu-system-x` (note that 'x' is the CPU architecture you want to emulate; I mostly use x86-64 recently for example). For Windows user, unless did you install QEMU by Scoop, you may need to navigate to the QEMU folder, usually at path `C:\Program Files\qemu` and run one of these executables, like below.
OBTW, you can't just run it without anything. You would need some arguments (or 'flags', which are some appending options that go behind the command, for example `command -f --flag1`) as a set-up for ready.
You'd need a virtual image disk to install into it. You need `qemu-img` to create image disk. The example for creating disk in CLI is as following:
`qemu-img create -f qcow2 disk_name.img 9696G` (remember to change it in your own, don't necessarily literally copy it!).
A virtual disk file will be created in the location of where you put the terminal up. The file extension is .img, but it's formatted as 'qcow2'. You can format it by other format too, but I will use qcow2 herein.
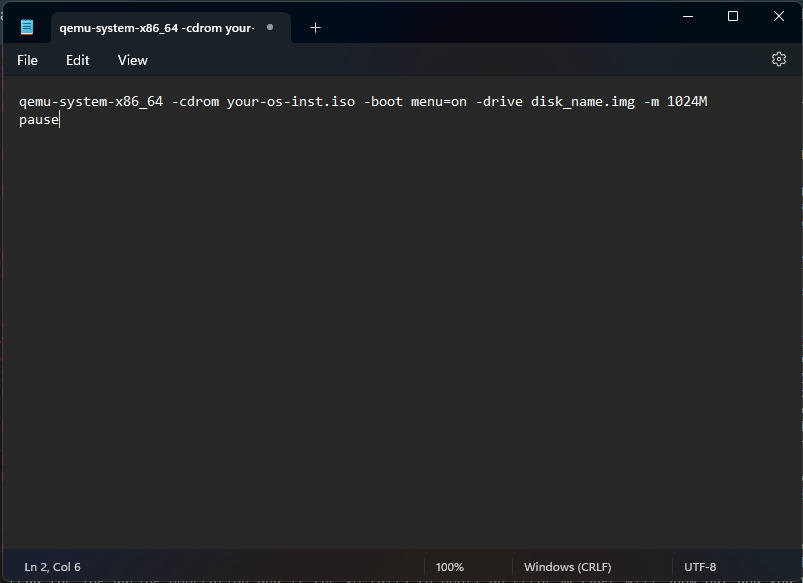
Now get your installation ISO file ready (Windows installation disk image or Linux ones, etc. with .iso extension) and gather everything up. As said, you have to run QEMU with some arguments before it should really work for you. A simple syntax to run it for you, supposedly you are using x86-64:
`qemu-system-x86_64 -cdrom your-os-inst.iso -boot menu=on -drive disk_name.img -m 1024M`
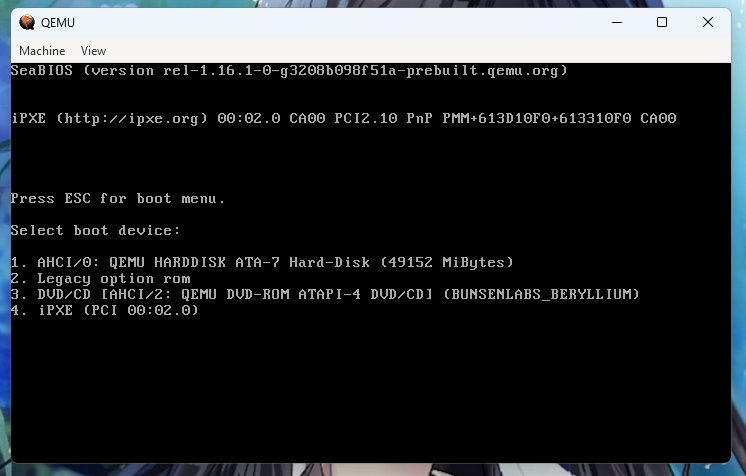
The `drive` argument is the .img image disk file that you created earlier with qemu-img. -m is memory or RAM, you can set it to a value following with M (megabyte) or G (gigabyte) as you prefer. -cdrom is of course a path to your installation .iso file. The -boot here prescribes some attributes when the VM boots. menu=on allows you to press ESC to show a boot manager while starting up the VM. You can try other option in -boot, such as setting boot order `-boot dcn` (d=CD-ROM, c=harddisk and n=network boot.)
If you set up the VM properly like above, it's sure that the VM would boot up. Otherwise, check your disk image location again and recorrect it.
It's recommended to put your syntax (the command above to run a simple VM) into a .bat file, then break a line and add a `pause` command in the last line so that when you run it, there'll be a terminal window showing the log which enables you to read the log during operation and if the VM fails to boot, an error message will show out and you will figure it out easier.
Linux? No, just run the syntax directly; a log will be right on the terminal window. This is for Windows users though. Just save it in a .txt or somewhere you want if you don't remember the syntax.
You can emulate some prescribed available particular CPU models, for example Ivy Bridge, Westmere (Intel) or Opteron (AMD). Add this flag everywhere in your command if you want, but after the qemu-system-x command:
`-cpu cpu-model`
For the cpu-model, you can refer to it here. In the table list of CPU models, remove the -v1, -v2, -v3, etc., 'cause QEMU doesn't recognise those. The -v is just for referrence; they are versions of ABI compatibility levels of those CPUs.
You can add more cores for it as well, add the flag `-smp 2` or 3, 4, 5, it's up to you, but don't add too much 'cuz it'd lag your machine!
There's an option for KVM virtualisation, but I couldn't enable it and it usually goes to a VM failure to run (KVM is actually for Linux only). If you can, you can search 'how to enable kvm in qemu' on a search engine. KVM virtualisation allows the VM to be accelerated (yes u r right, hardware acceleration) and made the most by leveraging both CPU and GPU to power the VM, not only CPU if you don't turn it on. Therefore, your VM will be very laggy if you don't. It's quite helpful, trust me bro. However, you can only use KVM if your machine use the same architecture with the VM.
And since if you can't enable KVM like me, try HAXM instead. HAXM stands for Intel(R) Hardware Accelerated Execution Manager, which is a cross-platform hardware-assisted virtualisation engine; it runs as a kernel-mode driver on host OS, provides a KVM-similar interface to userspace, enabling emulators like QEMU to utilise the hardware acceleration on modern CPUs with Intel Virtualisation Technology (a.k.a. Intel VT). Download the HAXM here, unzip the file, run the installer, then append `-accel hax` flag in your command syntax. Givit a shot again and enjoy.
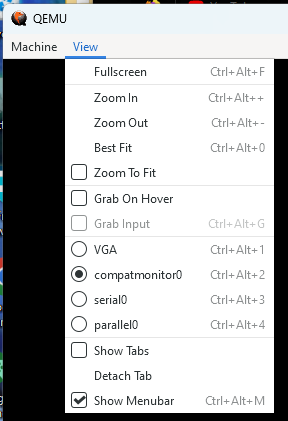
While using the VM, you can check out the Machine section or the View section. You can force reboot your VM, shutdown, adjusting the view, use compat_monitor0 console to send system signals, etc. Not so necessary, but it helps.
Conclusionly, it's not too hard to use QEMU, just the fact that this guide is getting longer than my expectation, which expected it to be a simple and easy to setup guide. But anyways, I made it to be as the most simple as possible, but I had to annotate something to make sure you would understand what the hell I am trying to tell (lol). It took me like over an hour to write it though, and it may have some mistakes. I'll try to recorrect them if I would see one.
And yeah, if you want to know what clue for me to write this simplified guide, I watched this video, and it helped me understand what is going on and how to use QEMU simply without so much other complexities. Thanks Denshi! (If you use Linux, then you should watch their video.)
And that's all for you. Hope it'd help you on using QEMU simply, and remember to read this guide thoroughly to understand more.
.
.
.
Last edited 6:04 p.m. at 3/18/23.